

联系我们
与泰克代表实时聊天。 工作时间:上午 9:00 - 下午 5:00(太平洋标准时间)。
致电我们
工作时间:上午9:00-下午5:00(太平洋标准时间)
下载
下载手册、产品技术资料、软件等:
反馈
2 Series MSO Declassification and Security Instructions
This document contains procedures to sanitize or remove memory devices from your 2 Series MSO.
此手册适用于:
MSO22, MSO24, MSO22-EDU, MSO24-EDU
相关产品信息
下载即代表您同意手册下载协议的条款和条件。
手册下载协议
注意:从本网站下载任何文档之前,请认真阅读以下条件和条款。 如果从泰克网站上下载手册,即表示您同意以下条件和条款:
当前支持的产品的手册:
泰克在此向泰克仪器的所有者授予权限和许可,可从此网站上下载和复制手册供其自己内部或个人使用。 除非经过泰克公司书面专门授权,当前支持产品的手册不得复制用于发行。
泰克手册可能会被更新以反映产品制造寿命过程中所做的更改。 因此,任何给定产品都可能存在多个手册版本。 请小心使用,确保为特定的产品序列号获取正确的手册版本。
不再支持的产品的手册:
对于不再适于长期支持的测量产品,泰克无法提供手册。 泰克特此向他人授予权限和许可,对于 (a) 拥有泰克部件号,并且 (b) 用于泰克不再支持的测量产品,可以复制和发行泰克任何测量产品手册的副本,包括用户手册、操作手册、维修手册等等。
泰克手册可能会被更新以反映产品制造寿命过程中所做的更改。 因此,任何给定产品都可能存在多个手册版本。 请小心使用,确保为特定的产品序列号获取正确的手册版本。
此授权和许可不适用于泰克仍在提供的任何手册和其他出版物,或者用于视频制作产品或彩色打印机产品的任何手册和其他出版物。
免责条款:
对于非泰克提供的、或者按照上述授权和许可复制或发行的任何测量产品手册或其他出版物,泰克对于其中所含任何信息、文字、图形、原理图、部件清单或其他材料的准确性和完整性不做保证。
泰克可能会随时更改本网站或其产品的内容而不事先通知。
责任限制:
对于使用按照上述授权和许可制作或发行的任何测量产品手册或其他出版物所造成的任何损害,包括但不限于利润损失、业务中断或侵犯知识产权,泰克不应承担责任。
Read Online
Preface
This document helps customers with data security concerns to clear or sanitize 2 Series MSO instruments. Instruments in this series contain a processor system with a non-removable mass storage.
These products have data storage (memory) devices and data export interfaces (USB and Ethernet). The following instructions explain how to sanitize the instrument.
Reference
- National Industrial Security Program Operating Manual (NISPOM), DoD 5220.22–M, Chapter 8
- Defense Security Service Manual for the Certification and Accreditation of Classified Systems under the NISPOM
Supported products
Tektronix 2 Series Mixed Signal Oscilloscope products are covered by this document.
Terms
- Clear: This removes data from media/memory before reusing it in a secured area. All reusable memory is cleared to deny access to previously stored information by a standard means of access.
- Erase: This is equivalent to clear.
- Media: Storage/data export device. A device that stores or exports data from the instrument, such as a USB flash drive or USB port.
- Sanitize: This removes the data from media/memory so that the data cannot be recovered using any known technology. This is typically used when the device is moved (temporarily or permanently) from a secured area to a non-secured area.
- Remove: This is a physical means to clear the data by removing the memory device from the instrument. Instructions are available in the product service manual.
- User-Accessible: The user can directly retrieve the memory device contents.
- User-Modifiable: The memory device can be written to by the user during normal instrument operation, using the instrument user interface or remote control.
- Volatile memory: Memory that loses data when the instrument is powered off.
- Nonvolatile memory: Memory that retains data when the instrument is powered off.
- Power off: Some instruments have a “Standby” mode, in which power is still supplied to the instrument. For clearing data, putting the instrument in Standby mode does not qualify as powering off. For these products, you must either push a rear-panel OFF switch or remove the power source from the instrument.
- Instrument Declassification: A term that refers to procedures that must be undertaken before an instrument can be removed from a secure environment. Declassification procedures include memory sanitization, memory removal, and sometimes both.
Clear and sanitize procedures
The following tables list the volatile and nonvolatile memory devices in the standard instrument and listed options.
Procedures to clear or sanitize these devices, if any, are given in each table.
Terms
- User data – Describes the type of information stored in the device. Refers to waveforms or other measurement data representing signals connected to the instrument by users.
- User settings – Describes the type of information stored in the device. Refers to instrument settings that can be changed by the user.
- Both – Describes the type of information stored in the device. It means that both user data and user settings are stored in the device.
- None – Describes the type of information stored in the device. It means that neither user data nor user settings are stored in the device.
- Directly – Describes how data is modified. It means that the user can modify the data.
- Indirectly – Describes how data is modified. It means that the instrument system resources modify the data and that the user cannot modify the data.
Volatile memory devices
These are the memory capacities at the time of publishing this document, but are subject to change.
| Type and size | Function | Type of user info stored | Backed up by battery | Method of modification | Data input method | Location | User accessible | To clear | To sanitize |
|---|---|---|---|---|---|---|---|---|---|
| SDRAM 2 GB (All models) | System memory | Both | No | Indirectly | Written by processor system and application software operations | Main board | No | Unplug the instrument and remove all battery packs for at least 30 seconds | Unplug the instrument and remove all battery packs for at least 30 seconds |
| CMOS RAM 13 bytes | Holds clock and boot configuration data | None | Yes | Indirectly | Boot operations | Main board | No | Cannot be cleared | Remove the Main board |
| FPGA <20 MB | Acquisition system | None | No | None | Written by processor | Main board | No | Unplug the instrument and remove all battery packs for at least 30 seconds | Unplug the instrument and remove all battery packs for at least 30 seconds |
Non-volatile memory devices
These are the memory capacities at the time of publishing this document but are subject to change.
| Type and Size | Function | Type of user info stored | Method of modification | Data input method | Location | User accessible | To clear | To sanitize |
|---|---|---|---|---|---|---|---|---|
| eMMC 4 GB or 8 GB | Stores application software and user data | Both | Directly | Application software operations and file operations | Main board | Yes | Run TekSecure | Remove the Main board |
How to sanitize an instrument
- Remove all external USB memory devices and store or destroy the USB memory devices in accordance with your organization’s guidelines.
- Follow the instructions in the Main board removal instructions to get access to and remove the Main board, which contains user data and settings. Store or destroy the Main board in accordance with your organization’s guidelines.
- Reassemble the instrument without the Main board and return it to Tektronix. The instrument will then be repaired and calibrated as necessary.
In North America, contact the Tektronix Customer Care Center (1-800-833-9200) for assistance with returning the instrument to a repair center. Worldwide, visit tek.com to find contacts in your area.
Main board removal instructions
- Disconnect the AC power adapter from the instrument.
- If installed, remove all batteries from the instrument.
- If installed, remove the battery pack from the instrument.
- Place the instrument on a work surface with the display facing up.
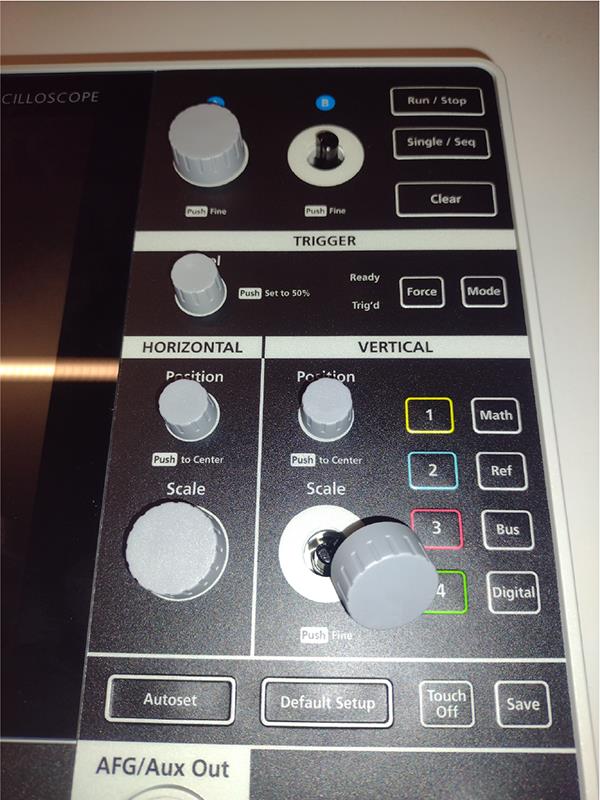
- Remove the seven knobs from the front of the instrument.

- Flip the instrument cover so the display is facing down.
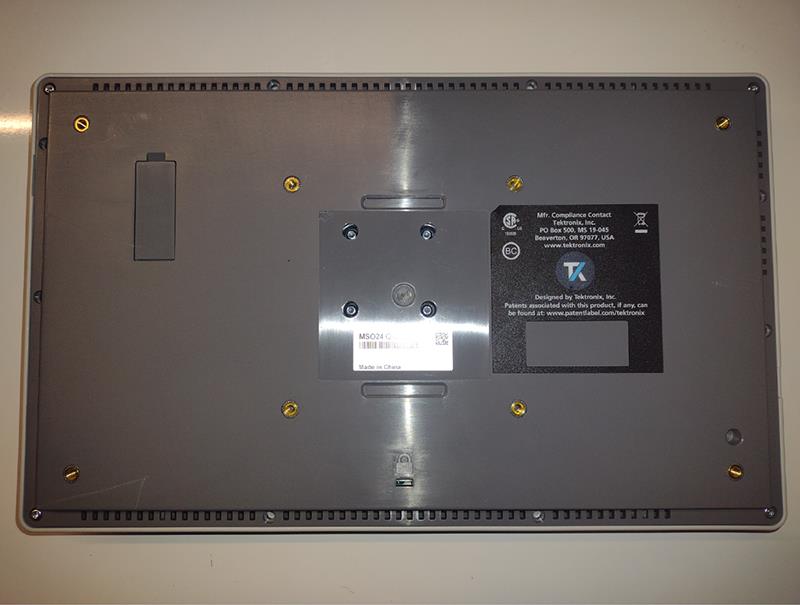
- Remove the rectangular label from the back of the instrument. Stick the label on the back of the instrument so that it is out of the way and not covering any screws.
- Using a T-10 screwdriver, remove the 16 PT thread forming screws from the back of the instrument.
- Remove the back cover of the instrument and set it aside.
The large circuit board visible inside the instrument is the Main board.
- Disconnect the power cable from the Main board by pressing on the tab near the wire-end of the connector and sliding the connector away from the board.
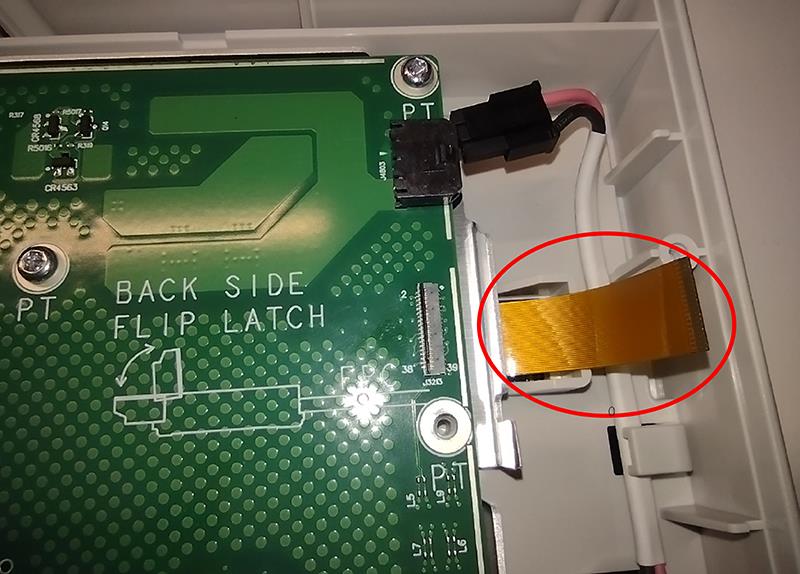
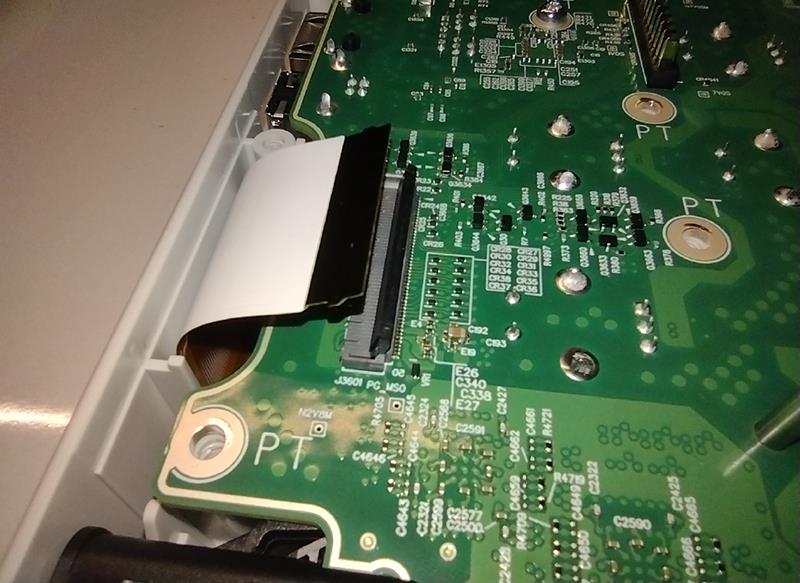
- Disconnect the display cable from the Main board by flipping up the latch on the backside of the connector and sliding the cable out. Use the illustration printed on the Main board near the connector for reference.
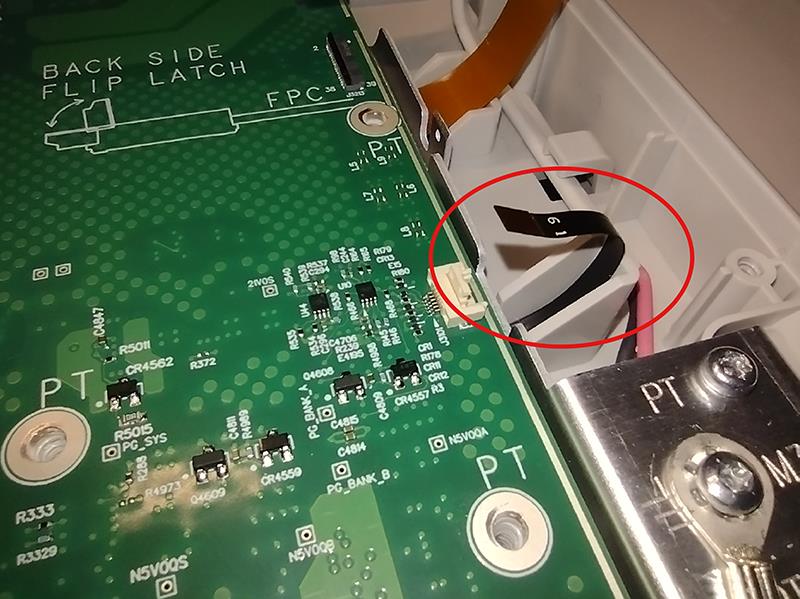
- Disconnect the touch screen cable from the Main board by flipping up the latch on the cable-side of the connector and sliding the cable out of the connector.
- Disconnect the front panel cable from the Main board by flipping up the latch on the cable-side of the connector and sliding the cable out of the connector. This cable includes hook features, so the cable must be lifted out of the connector while sliding it out.
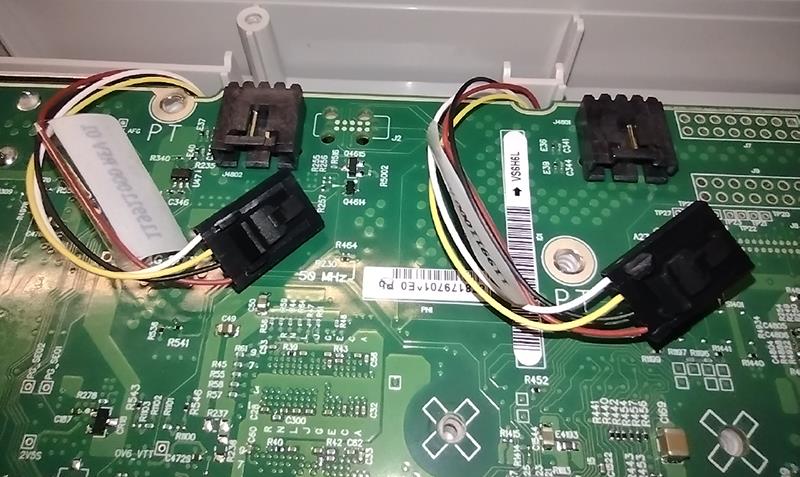
- Disconnect the two fan cables from the Main board by pressing on the tab on the connector and sliding the connector away from the board.
- Remove the 24 screws from the Main board.
- Slowly work around the edges of the Main board and lift the board straight out of the enclosure.
- Reattach the back cover using the PT thread forming screws from the instrument.
Repair charges
Replacement of damaged and missing hardware is charged according to the rate at the time of replacement.