

联系我们
与泰克代表实时聊天。 工作时间:上午 9:00 - 下午 5:00(太平洋标准时间)。
致电我们
工作时间:上午9:00-下午5:00(太平洋标准时间)
下载
下载手册、产品技术资料、软件等:
反馈
2-PC Protective Case Instructions
This document provides information for the 2-PC protective case, soft case, and kickstand. It includes instructions for installing the kickstand and protective case on your 2 Series MSO.
此手册适用于:
MSO22, MSO24, 2-PC, MSO22-EDU, MSO24-EDU
相关产品信息
下载即代表您同意手册下载协议的条款和条件。
手册下载协议
注意:从本网站下载任何文档之前,请认真阅读以下条件和条款。 如果从泰克网站上下载手册,即表示您同意以下条件和条款:
当前支持的产品的手册:
泰克在此向泰克仪器的所有者授予权限和许可,可从此网站上下载和复制手册供其自己内部或个人使用。 除非经过泰克公司书面专门授权,当前支持产品的手册不得复制用于发行。
泰克手册可能会被更新以反映产品制造寿命过程中所做的更改。 因此,任何给定产品都可能存在多个手册版本。 请小心使用,确保为特定的产品序列号获取正确的手册版本。
不再支持的产品的手册:
对于不再适于长期支持的测量产品,泰克无法提供手册。 泰克特此向他人授予权限和许可,对于 (a) 拥有泰克部件号,并且 (b) 用于泰克不再支持的测量产品,可以复制和发行泰克任何测量产品手册的副本,包括用户手册、操作手册、维修手册等等。
泰克手册可能会被更新以反映产品制造寿命过程中所做的更改。 因此,任何给定产品都可能存在多个手册版本。 请小心使用,确保为特定的产品序列号获取正确的手册版本。
此授权和许可不适用于泰克仍在提供的任何手册和其他出版物,或者用于视频制作产品或彩色打印机产品的任何手册和其他出版物。
免责条款:
对于非泰克提供的、或者按照上述授权和许可复制或发行的任何测量产品手册或其他出版物,泰克对于其中所含任何信息、文字、图形、原理图、部件清单或其他材料的准确性和完整性不做保证。
泰克可能会随时更改本网站或其产品的内容而不事先通知。
责任限制:
对于使用按照上述授权和许可制作或发行的任何测量产品手册或其他出版物所造成的任何损害,包括但不限于利润损失、业务中断或侵犯知识产权,泰克不应承担责任。
Read Online
Description
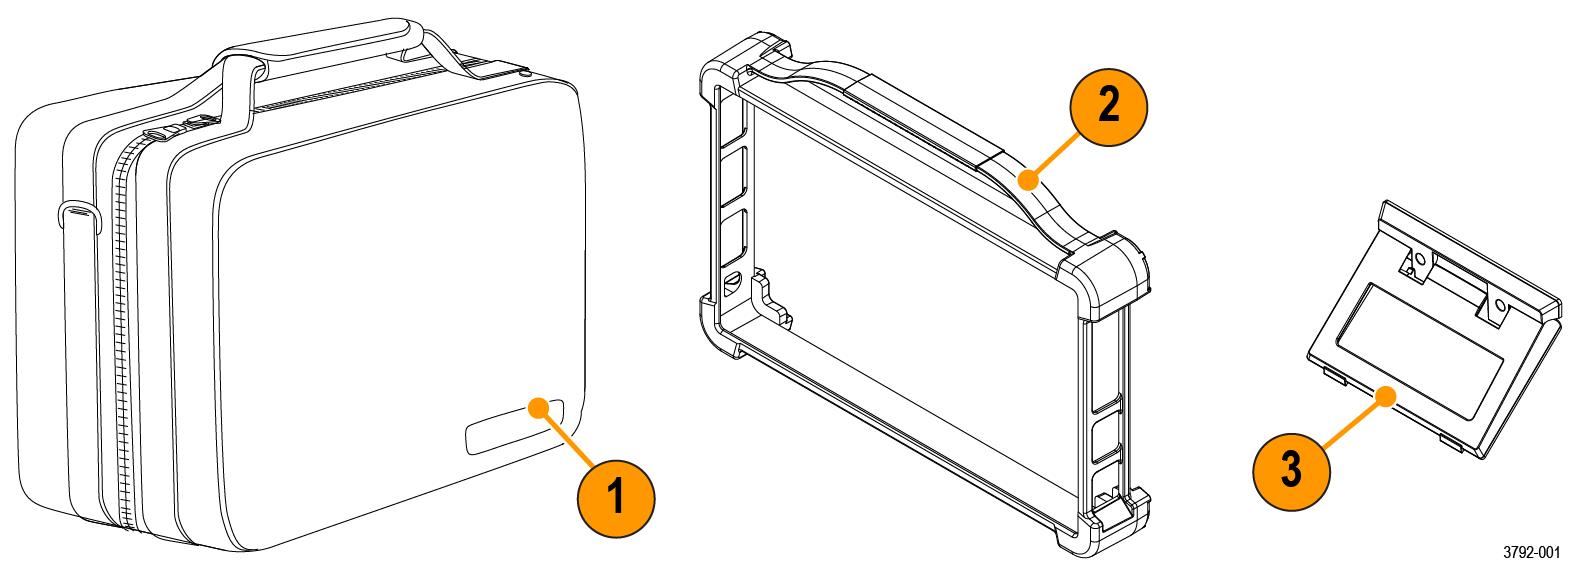
The 2-PC includes a soft carrying case, a protective case that fits around the outside edges of the instrument, and a kickstand.
| Item | Description |
|---|---|
| 1 | Soft carrying case includes two interior zipper pockets, rear slip pocket, and shoulder strap. |
| 2 | Synthetic rubber protective case. Provides extra protection against drops, increased grip, and carrying handle. |
| 3 | Kickstand provides a hands-free option to position your instrument at an angle on a work surface. |
Soft carrying case description
| Item | Description |
|---|---|
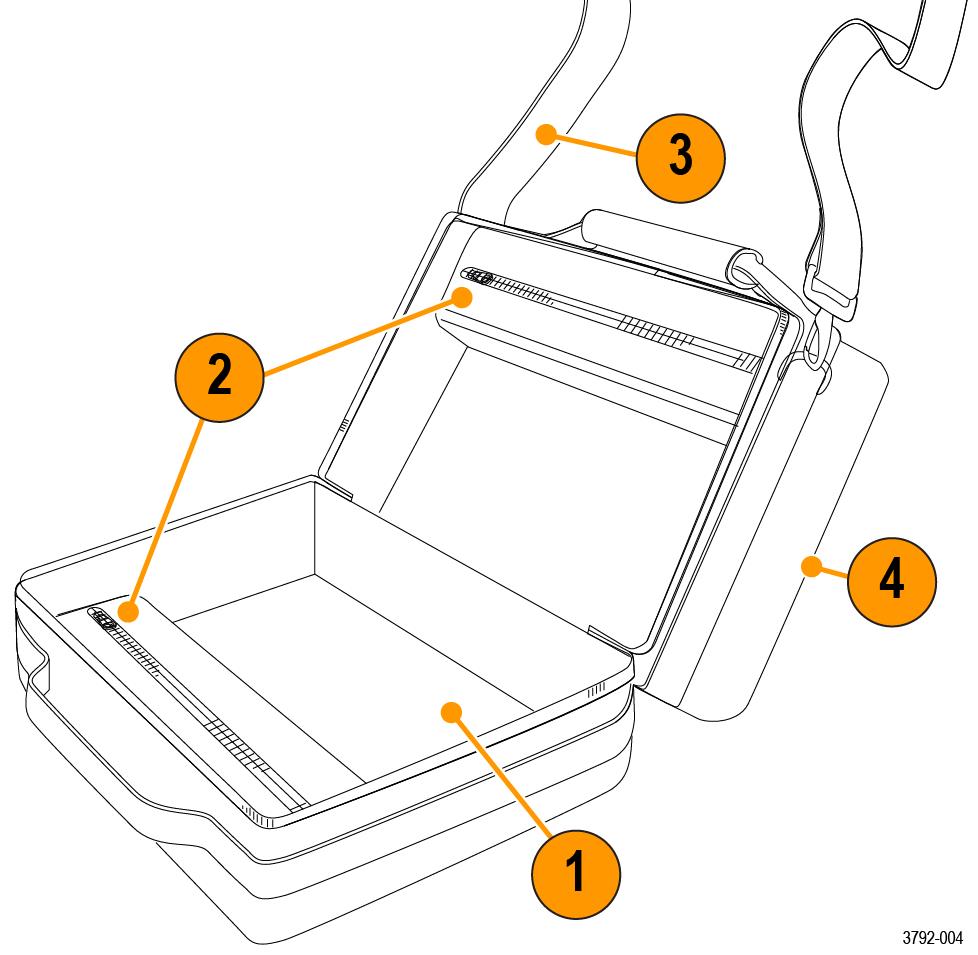
| 1 | Area designated for one 2 Series MSO instrument. Fits an instrument with protective case and kickstand installed. |
| 2 | Two storage pockets. Fits accessories like the power supply, probes, and cables. |
| 3 | Shoulder strap for case transit. |
| 4 | Rear slip pocket for cables, probes, or documentation. |
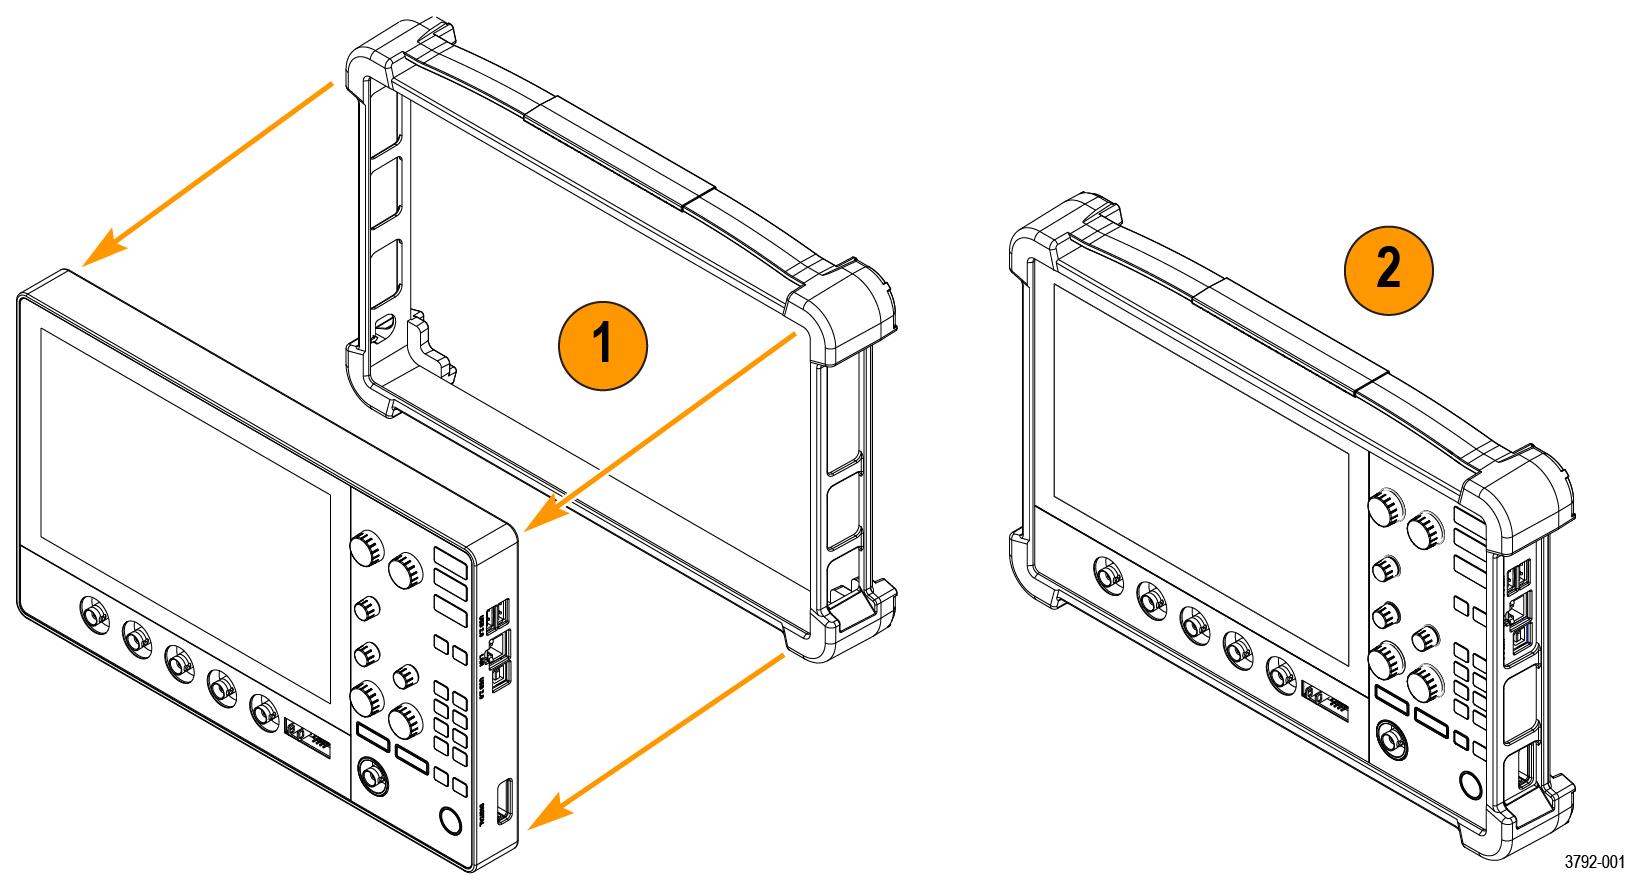
Install the protective case
Procedure
Install the kickstand
Before you begin
Use a screwdriver handle with No. 2 Phillips screw tip or a No. 2 Phillips screwdriver to install the kickstand onto your instrument.
Procedure
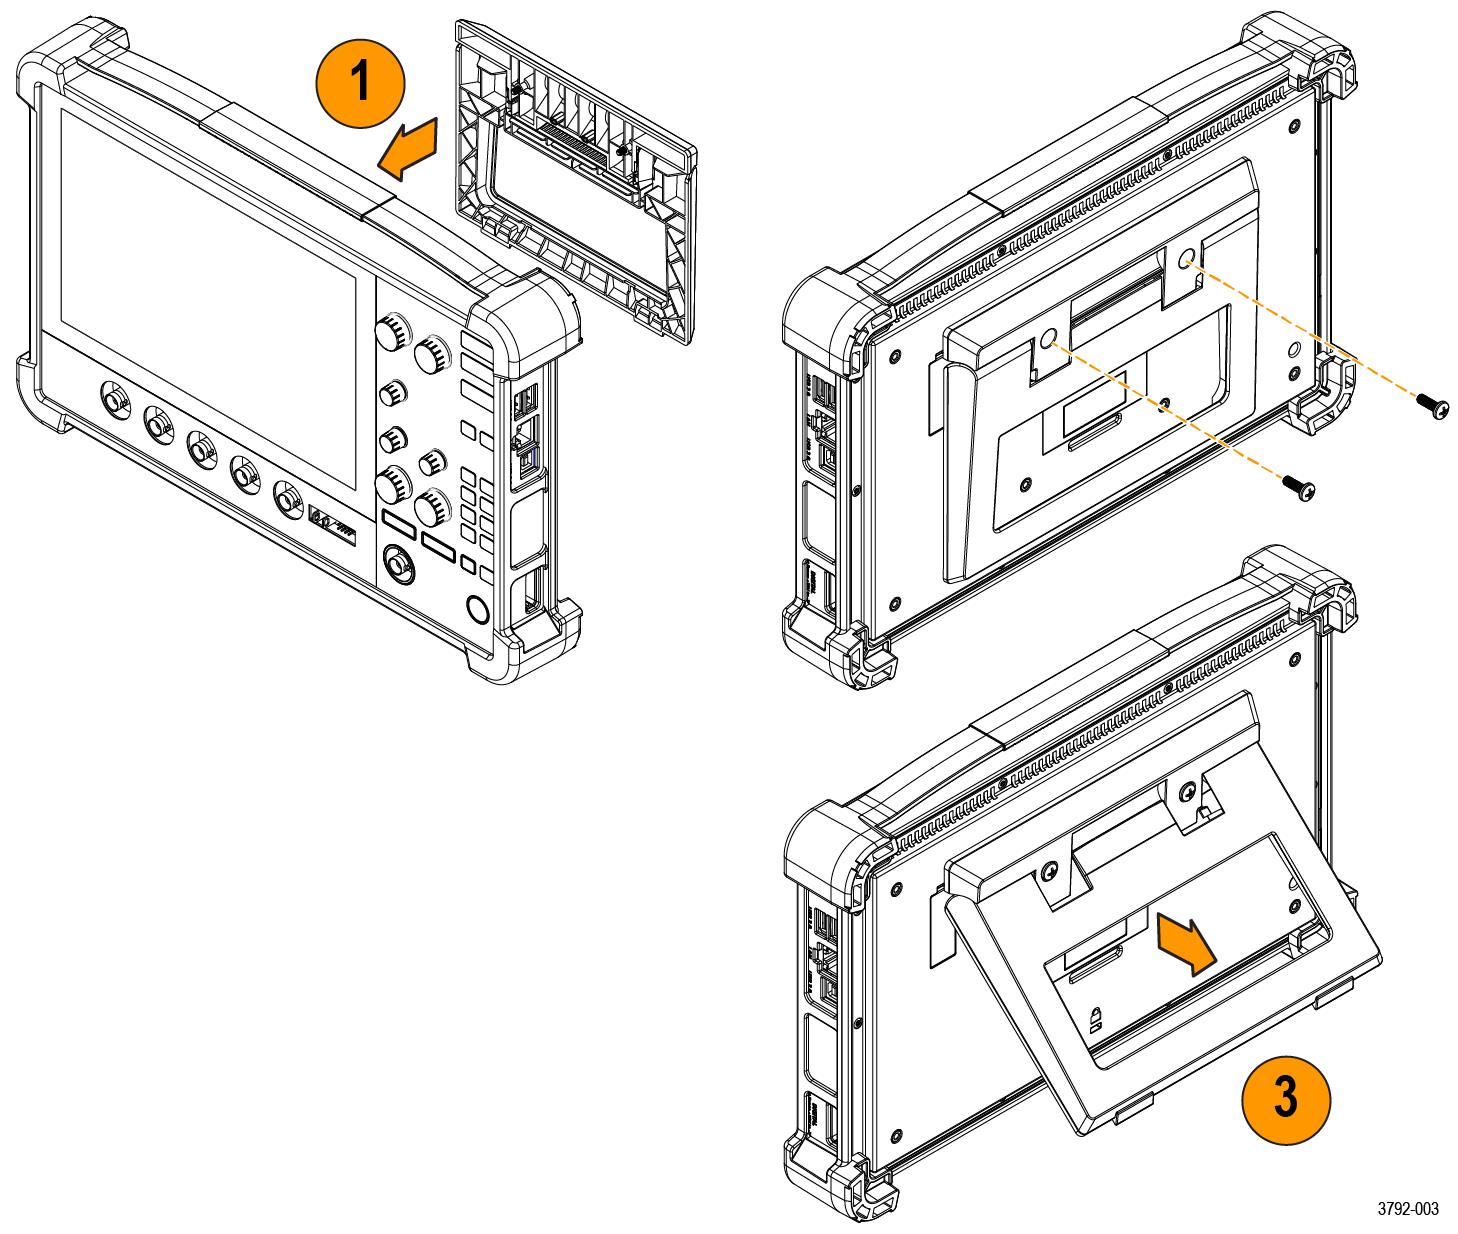
- Align the kickstand with the two top VESA mount holes (closest to the top of the label) on the back of the instrument.
- Install the two screws included with your kickstand.
- Pull the bottom of the kickstand out to position your instrument at an angle.